The Cloud Consolidation Extension for SAP Analytics Cloud streamlines the entire consolidation process, from data import and preparation to currency conversion, ownership management, intercompany matching, eliminations, and journal postings.
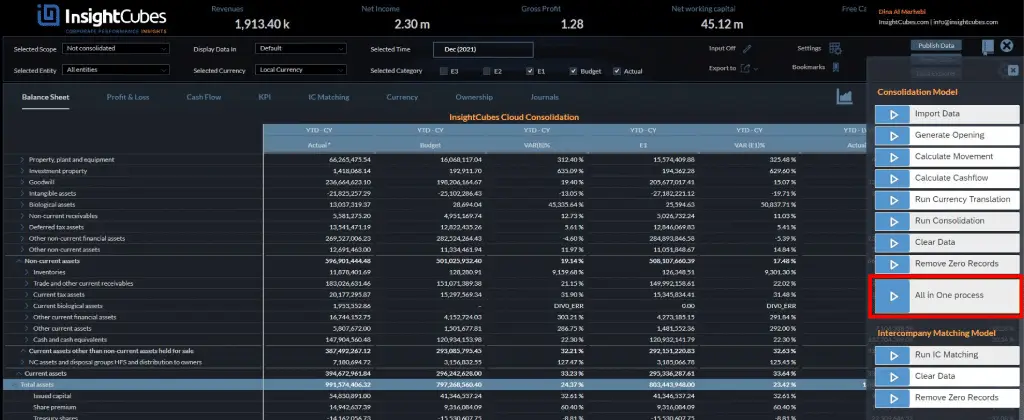
In this blog, we explain step by step how to use the extension as an end-to-end process. While you can execute all steps at once using the All-in-One data action trigger, we will demonstrate each step individually to show detailed results.
Data Preparation Steps
Data loading and preparation
1. Upload data from source systems
To import data, first step is to import the trial balances of all the companies from all the source systems for a specific date.
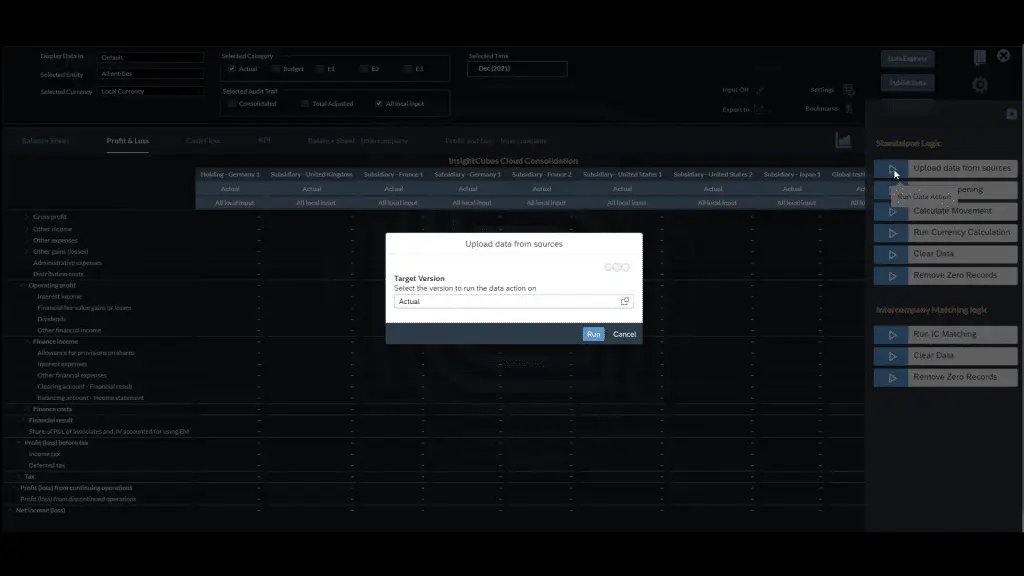
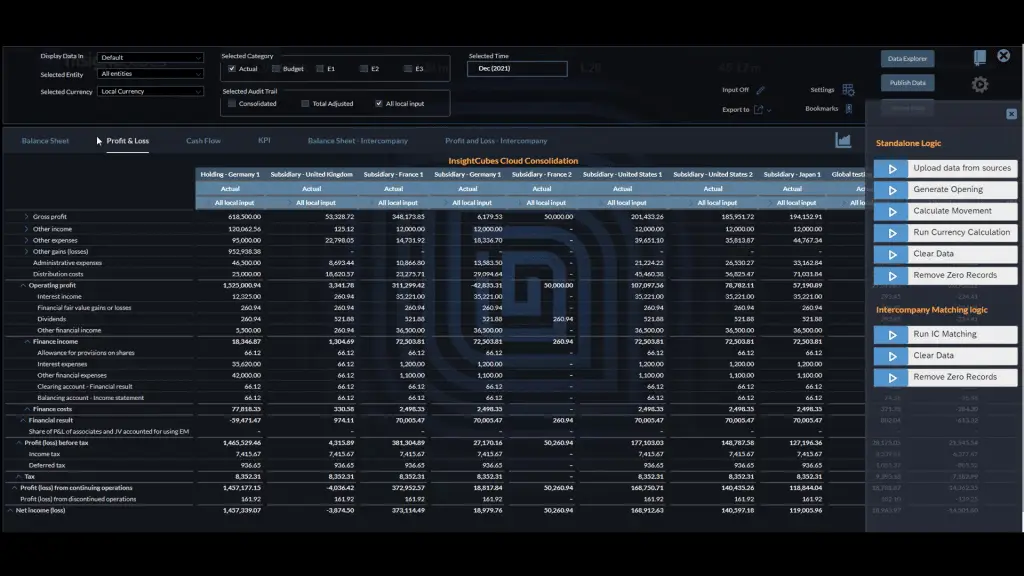
Once the upload concludes, the system stores each company’s Statement of Financial Position (Balance Sheet) and Profit and Loss statement in their local currencies on the Consolidation Model.
2. Generate opening balances by copying the prior year-end closing values of the balance sheet to the opening of the current year.
Generating the Opening balance for these companies balance sheet statements is now possible through running the generate Opening data action trigger, which will take the previous year end closing balance and post it on the opening flow of current years’ months.

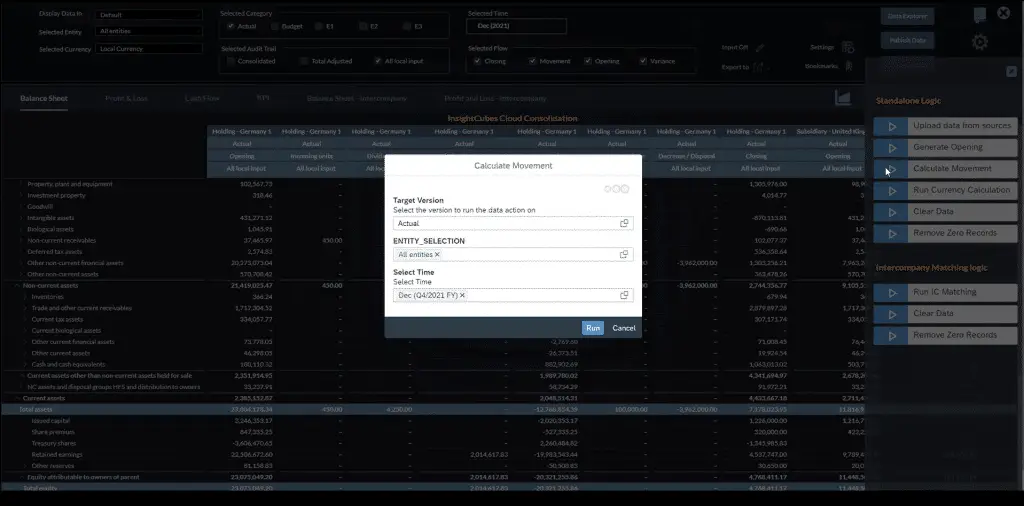
3. Run calculation of Variance. The system will calculate the Variance between the values of opening with movement against closing values.
Running the Calculate Movement data action trigger will execute the calculation of the net variance flow which is basically the difference between the sum of the opening with all the movements against closing.
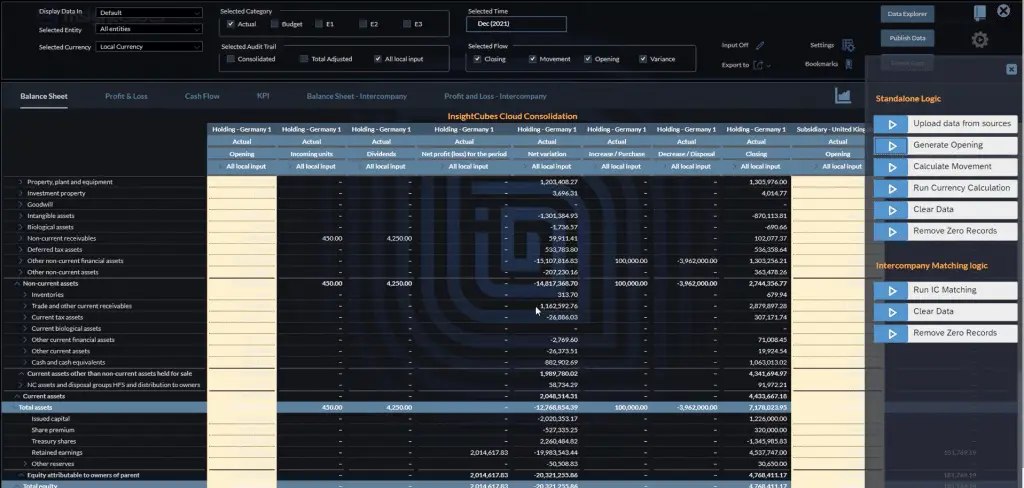
Now our statement of financial position has the opening values, movements, closing, and net variance. Also a specific flow in the retained earning has the YTD value of the net income from the profit and loss statement.
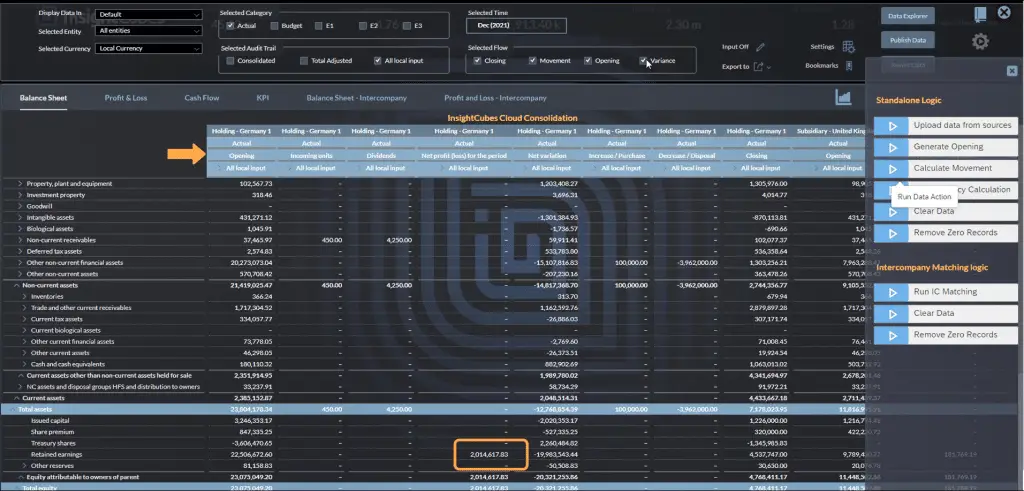
This Ad-hoc report displays the same data.
[sliders_pack id=”9652″]
Entering Currency Conversion Rates
Global Rates
After generating the financial statements we convert the values from the local currency of each entity by entering the Currency Conversion Rates for each reporting currency. These rates are automatically stores in the rates model (Driver model for currency conversion logic in the consolidation model).
Executing the currency conversion data action trigger will automatically convert the financial statements from the local currencies of the companies to any desired set of our reporting currencies.
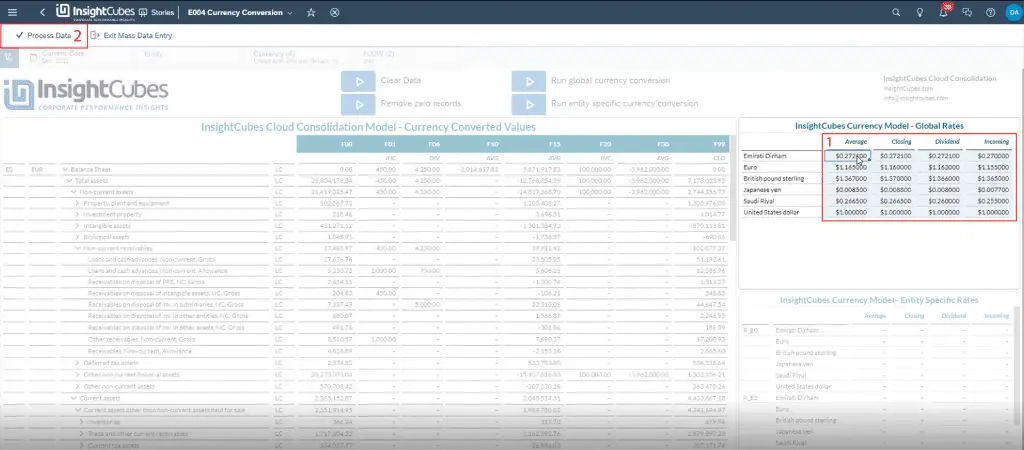
Entering the Global rates on the InsightCubes Currency Model – Global Rates (1) in Mass Data Entry Mode, then clicking the “Process Data” button as shown in the screenshot below.
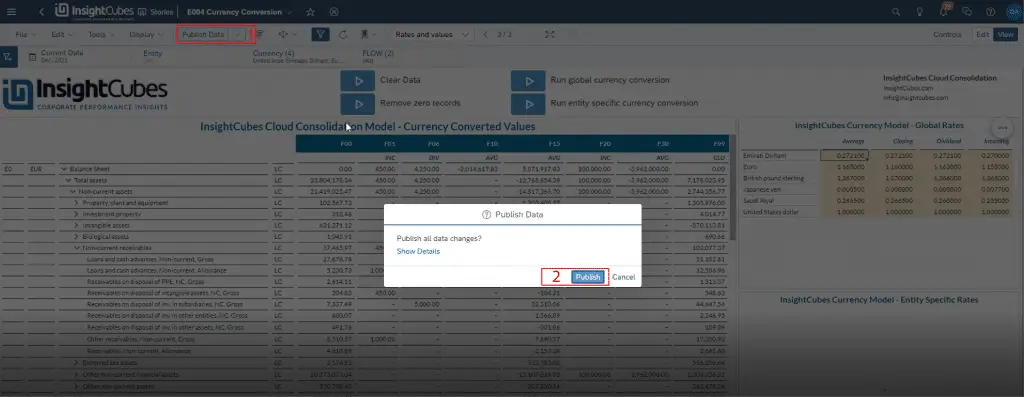
After processing the entered data, click “Publish Data” (1). A popup will display the data records – then click “Publish” (2) to complete the action.
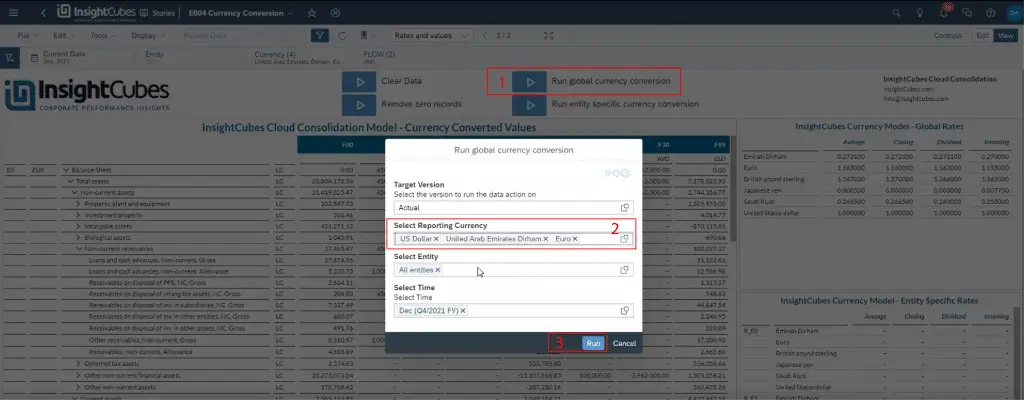
After publishing the Data click the “Run Global Currency Conversion” Data Action Trigger button, a popup will appear allowing the user to finalize the selections, we entered the currencies that we entered the rates for in the “Select Reporting Currency” filter (2), then click “Run” (3).
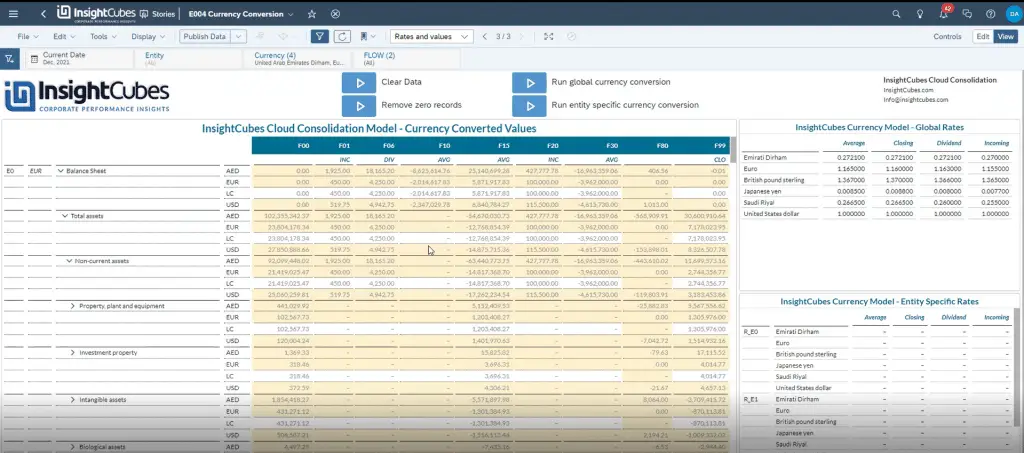
Refresh the data to generate the report with all entered conversion rates, as shown in the screenshot. Each balance sheet movement converts using its assigned rate, and a translation adjustment is created for each account on the specific flow.
You can add unlimited rates and currencies without writing any code, as the system applies them automatically through assignment.
Entity Specific Rates (optional)
If some of the entities have unique conversion rates we can use the entity specific rate. After unpublishing the currency converted values, enter the rates for each currency for the entities with unique rates, save and publish the entity specific rates in the rate model, then trigger the “Run Entity Specific Currency Conversion” Data Action Trigger. The system will first convert the financial statements of these specific entities using their corresponding entity specific rates and then convert the financial statements for the remaining entities using the global currency rates.
Ownership Manager
Before running the consolidation, we manage the Ownership Structure. We can create as many scopes and sub-scopes as needed with the ownership interface.
Adding Entities to Scopes, processing the selection, publishing the data and running the Copy Data.
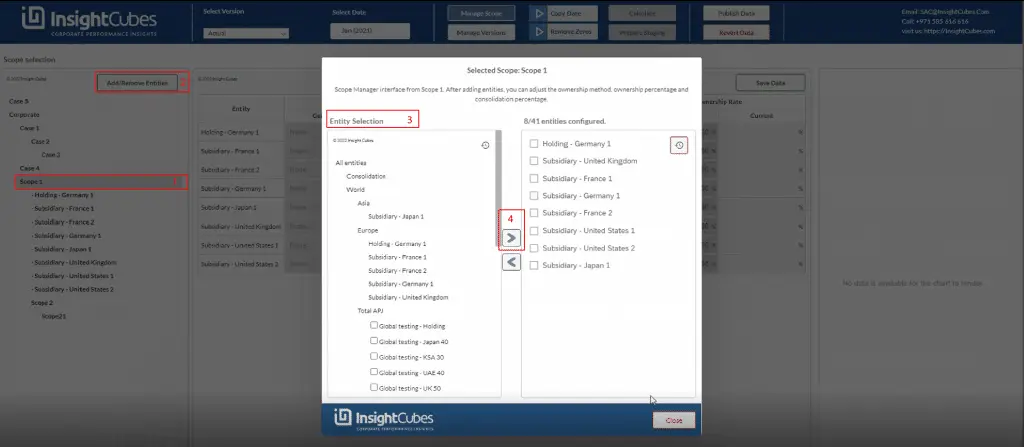
In the above screenshot we highlighted the steps of adding an Entity to a selected Scope in sequence.
First (1), the Scope must be selected from the Scope Selection panel, then click the “Add/Remove Entities” (2) button, a popup will appear with the list of entities (3) on the left side of the popup. Select the specific entities and click the right pointing arrow (4), they will be added to the report. Click close on the popup.
Filling Consolidation Methods and Rates

After adding the specific Entities we will be able to start filling in the Consolidation Method, Consolidation Rate, and Ownership Rate for each entity.
As shown in the above screenshot; the Method is chosen from a dropdown, whether it is None, Holding, Full, Equity, or Proportionate. Then the percentages are added in the Consolidation Rate and Ownership rate Columns and the data is “Saved and Published”. The same is done for the sub-scopes.
The system adds the selected entities to the Scope. You can add another set of entities to a different scope using the same steps.
Copying Ownership Structure
As an option, the full ownership structure can be copied (The consolidation methods, ownership rates, consolidation rates and the relationship between entities and scopes from one period to many destination periods). To explain this optional process, clicking on the “Copy Data” button the data action trigger popup is opened.
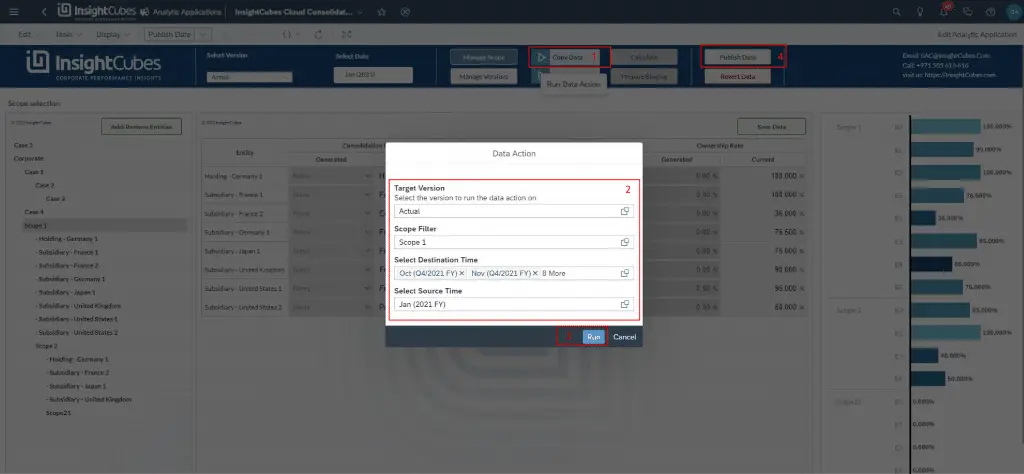
The system displays the Target Version, Scope Filter, and Select Destination Time in the Data Action popup, based on where the entities were published. The user can choose the desired time from the ‘Select Source Time’ filter, then click ‘Run.’. Upon success, a message will appear stating that “The data action finished running on Version “Actual” in our case. Then click “Publish Data” (4) another message will appear “You’ve successfully published the version”.
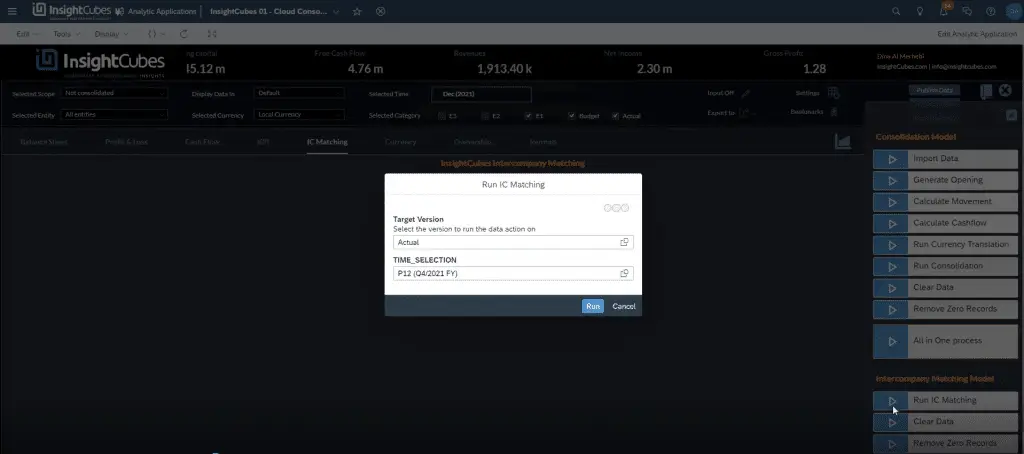
Run Intercompany Matching
Conduct the intercompany matching before running the consolidation and before managing the ownership structure to speed up reconciliation. The Run IC Matching data action triggers the system to match intercompany transactions between entities. This ensures each entity can check their partner companies’ bookings and quickly reconcile any differences. Post the differences per account on the seller, buyer, or the party with the positive or negative balance.
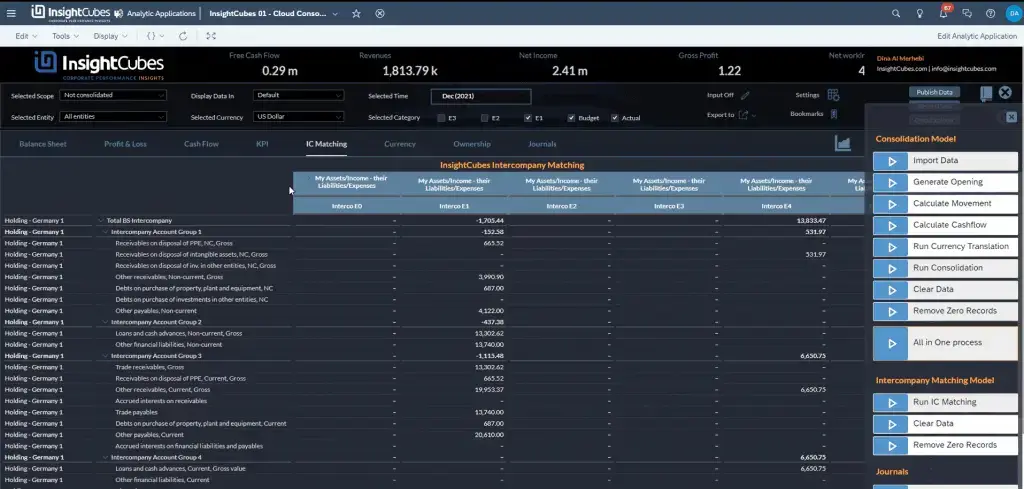
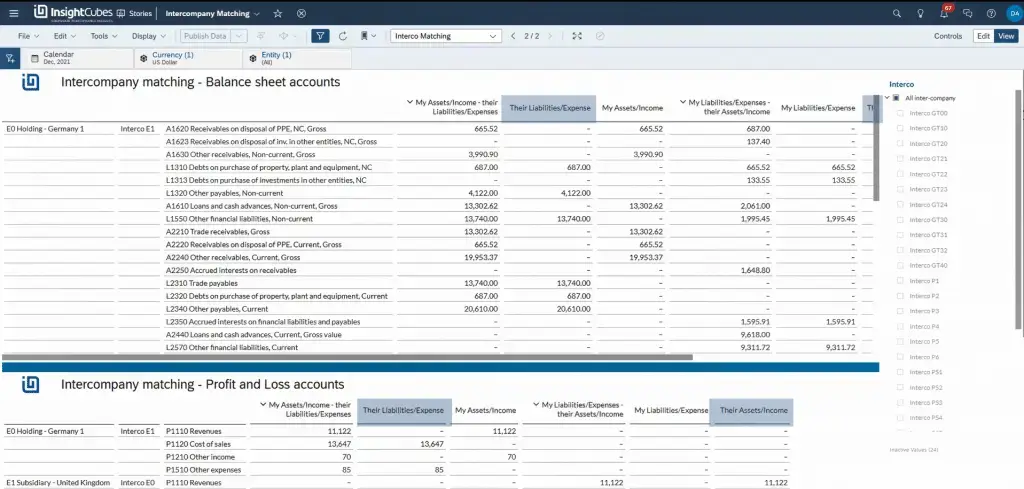
The Audit Trails in the columns labeled Their Liabilities/Expenses and Their Assets/Income in the screenshot below show what the partner company booked against our company.
Run Consolidation
After checking the intercompany matching results, we proceed to run the consolidation process, this process will take the consolidation method into consideration, each method has a specific set of automated eliminations and adjustment rules.
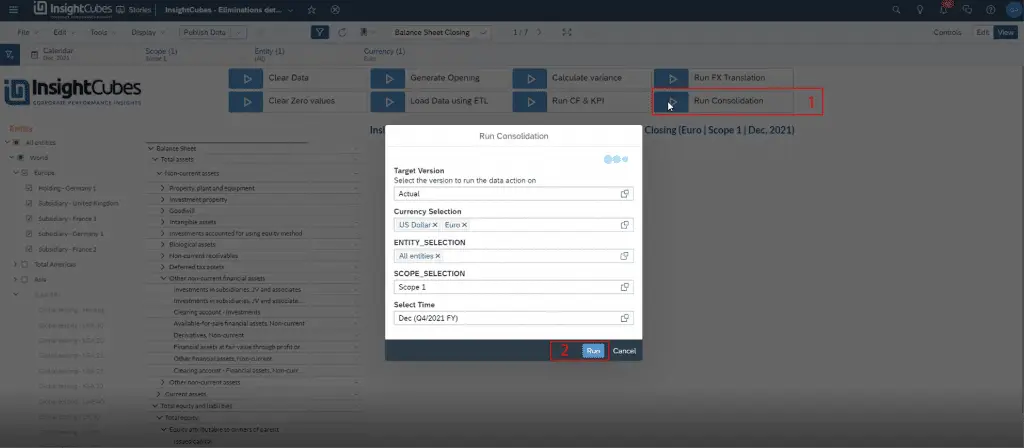
The user can edit the filters in the Run Consolidation popup. Click ‘Run.’ Watch for two messages:
- “The system has scheduled the Data Action ‘InsightCubes-Consolidation’ on version ‘Actual.’”
- “The Data Action ‘InsightCubes-Consolidation’ ran on version ‘Actual,’ and the system published the results. Please refresh to see them.”
Refresh the sheet to update the report figures, as shown in the screenshot.
In this ad-hoc report
[sliders_pack id=”9667″]