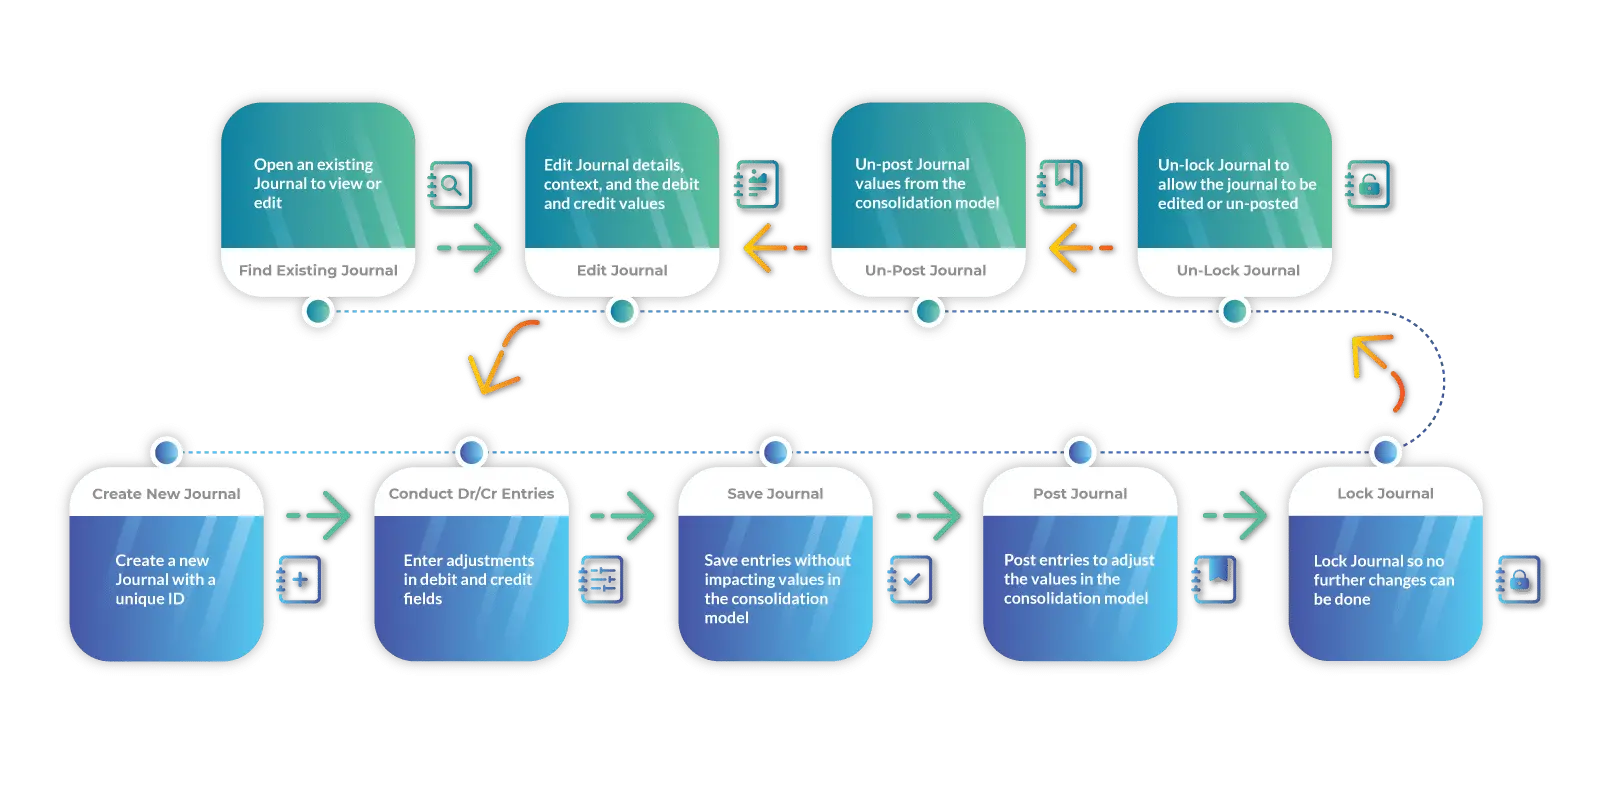
Overview and Purpose of Journals in SAP Analytics Cloud
The Journals in SAP Analytics Cloud (SAC) allows users with journal entry rights to create and manage journal entries efficiently. First each journal is assigned a unique ID, enabling users to adjust financial records directly by entering values in debit and credit fields. In addition, users can select specific audit trail members, which determine whether the journal undergoes currency conversion, is included in consolidation, or is impacted by other financial processes.
Furthermore, journals can be applied at the entity level or as top-line adjustments on consolidated balances. Depending on the use case, entries can be manually recorded or uploaded via Excel. Finally, users have full control over journal entries, including the ability to save, post, un-post, lock, unlock, and delete them, ensuring accurate financial oversight across subsidiaries and holding companies.
Introducing New Design and Theme Options!
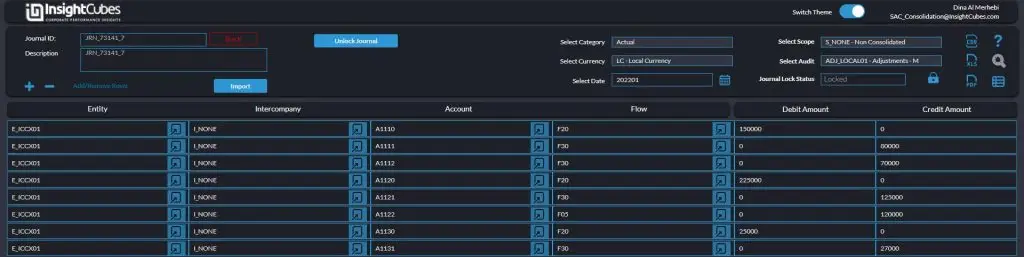
Announcing a major update to all our dashboards! We’ve undergone a comprehensive design revamp, bringing a fresh, modern look and feel to enhance your user experience.
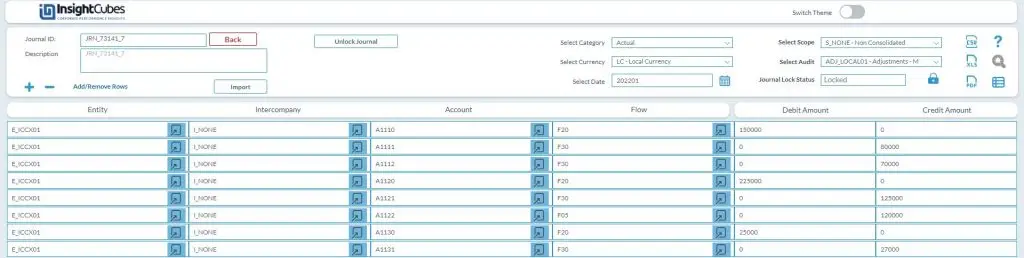
Now you can easily toggle between themes based on your visual preference or ambient lighting, ensuring optimal readability and comfort.
Understanding Journal Entries in the Consolidation Extension for SAP Analytics Cloud
Users can create different types of journal entries to handle various financial consolidation scenarios. While the Consolidation Extension for SAP Analytics Cloud automates eliminations and adjustments, users still need to make some manual journal entries for one-time adjustments.
Journal entries can involve currency conversion when recorded at the entity level in local currency or directly in group currency. Some journals are subject to consolidation rules, while others serve as top-line adjustments. The selected audit trail members define the consolidation treatment and whether journal values carry forward to the next year’s opening balances.
Journal governance is essential, as roles and authorizations control who can create, edit, post, or approve journal entries. The Consolidation Extension for SAP Analytics Cloud distinguishes between users who can create journals and those who can approve and post them, ensuring accountability and data security.
Creating new Journal entries
To create a new journal entry:
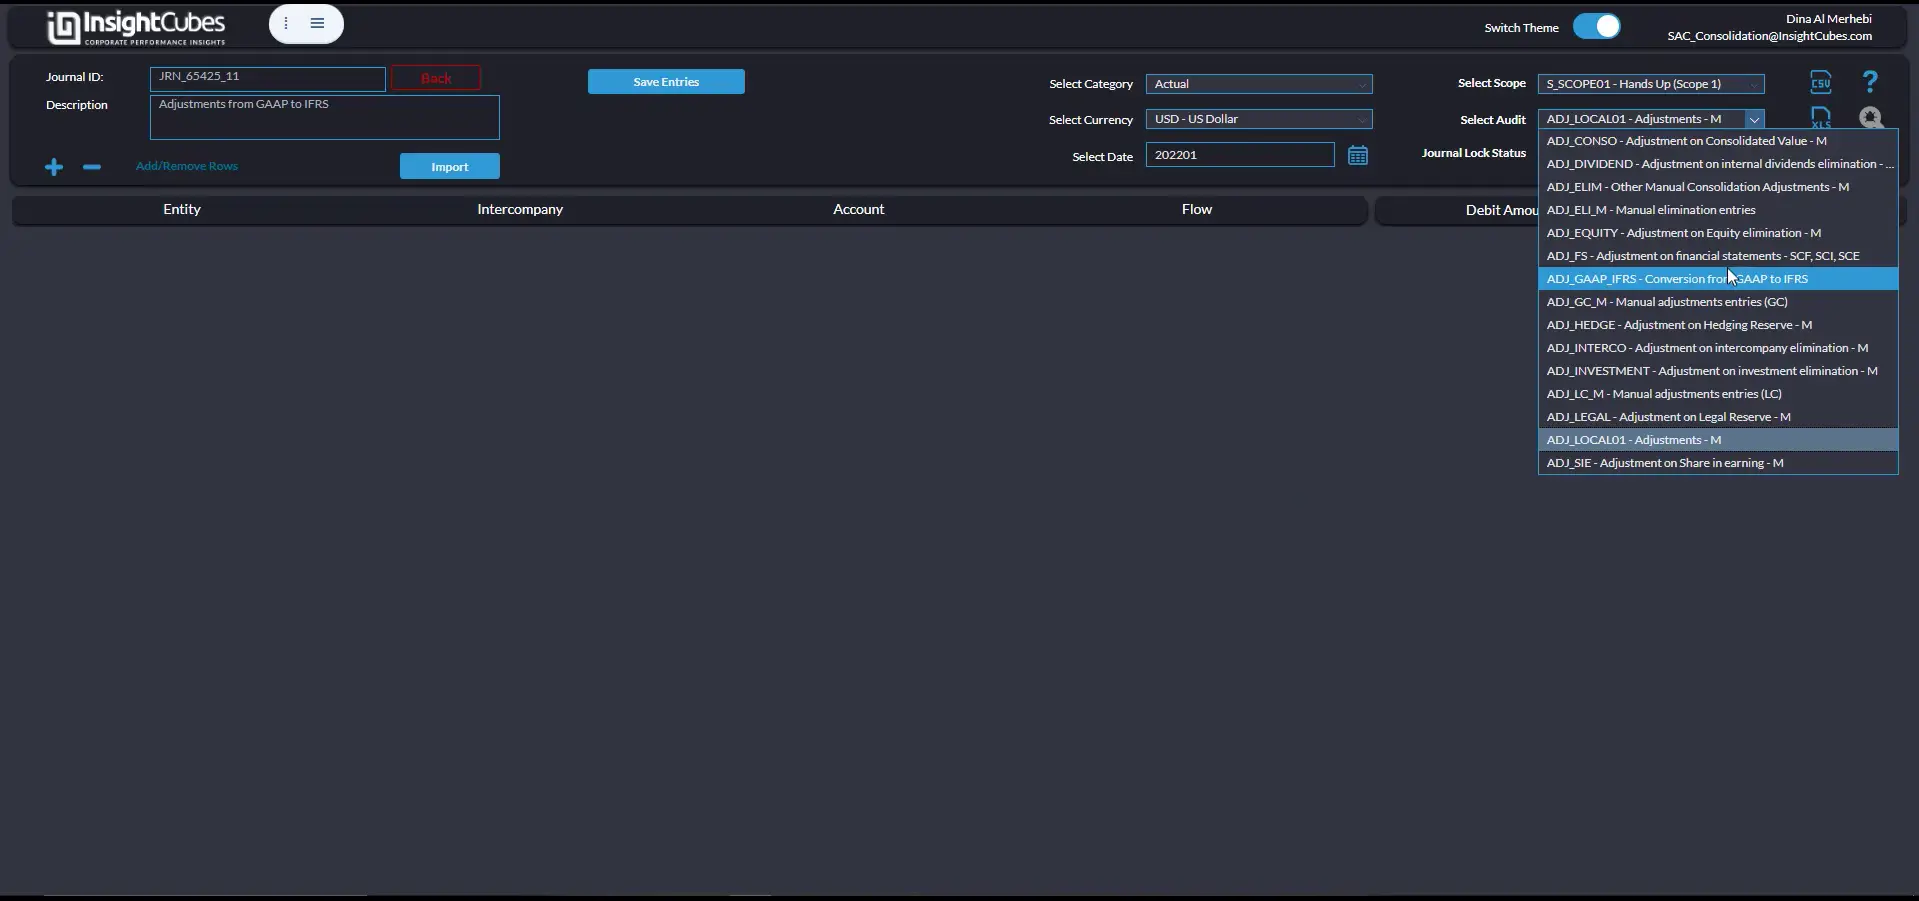
- Enter a journal description and define relevant dimensions, including version, currency, scope, audit trail, and date.
- Select the version (Actual, Budget, Plan, or Forecast).
- Choose the currency (Local or Reporting currency).
- Define the scope (affecting consolidation or standalone adjustments).
- Specify the audit trail to determine adjustment classification.
- Set the journal date (year and month).
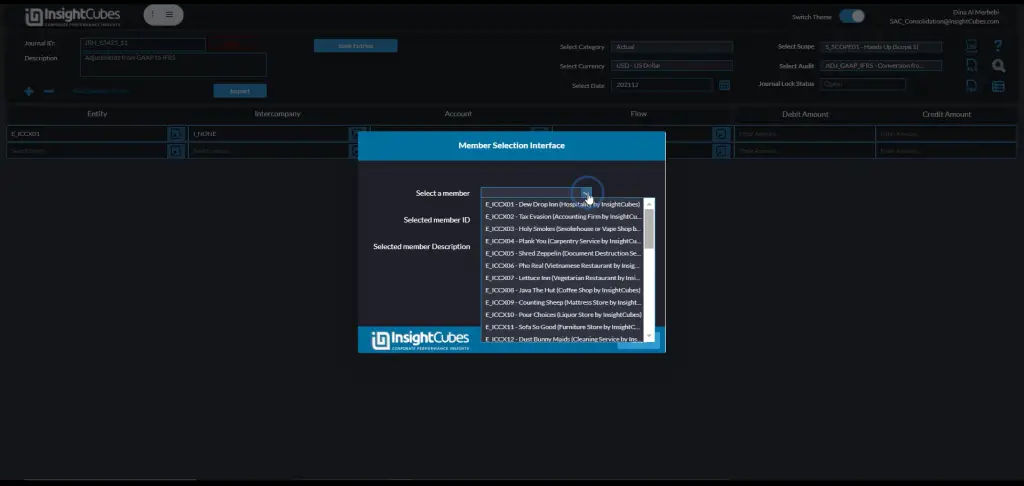
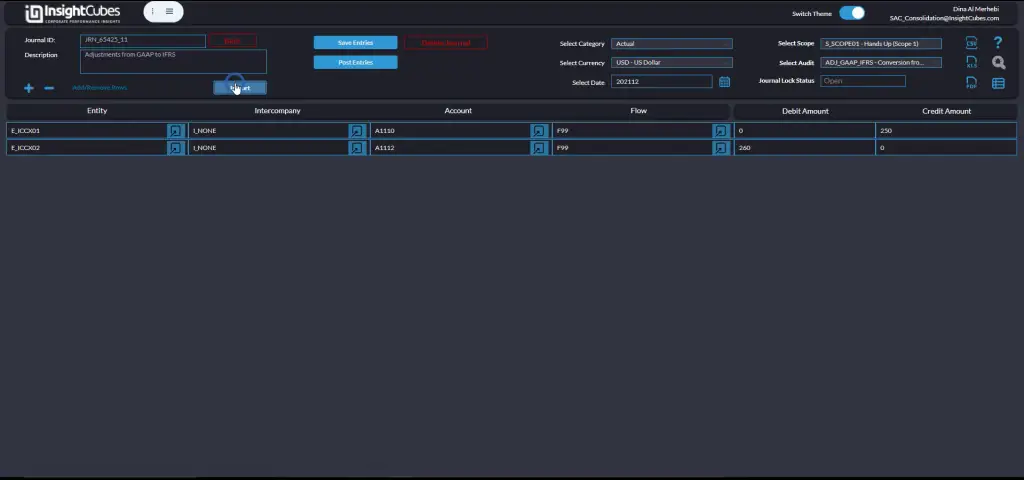
- Add journal line items by clicking the plus icon and entering values manually or selecting members from the available dimension popups.

Add journal line items by clicking the plus icon and entering values manually or selecting members from the available dimension popups.
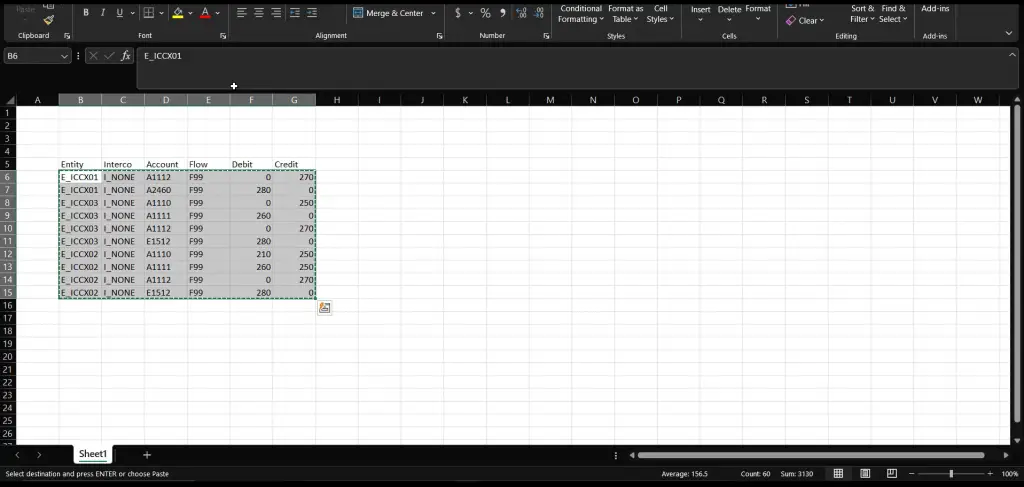
Mass Data Entry via Excel Import
For bulk journal entries, users can import data from Excel:
Click “Import” to create journal entries in bulk.
Click “Import”.
Paste Excel data into the provided input field.

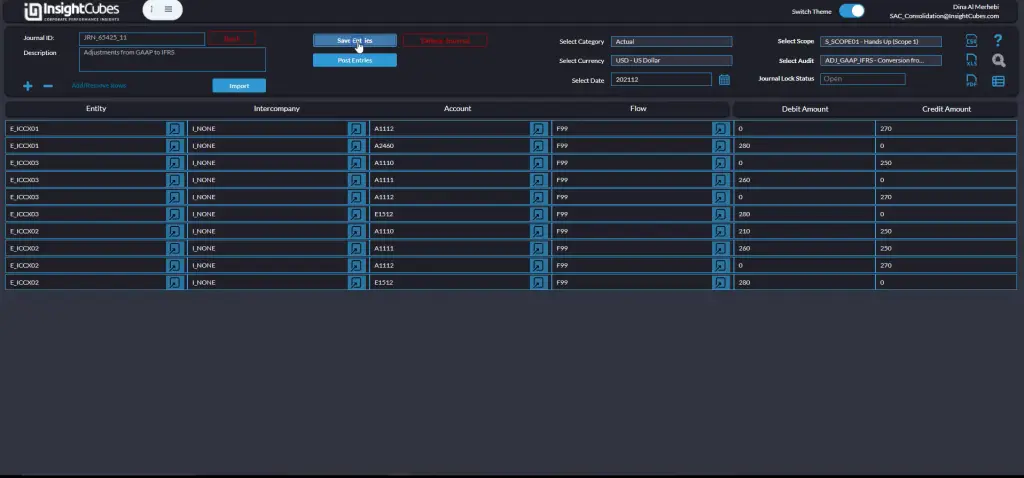
Saving data
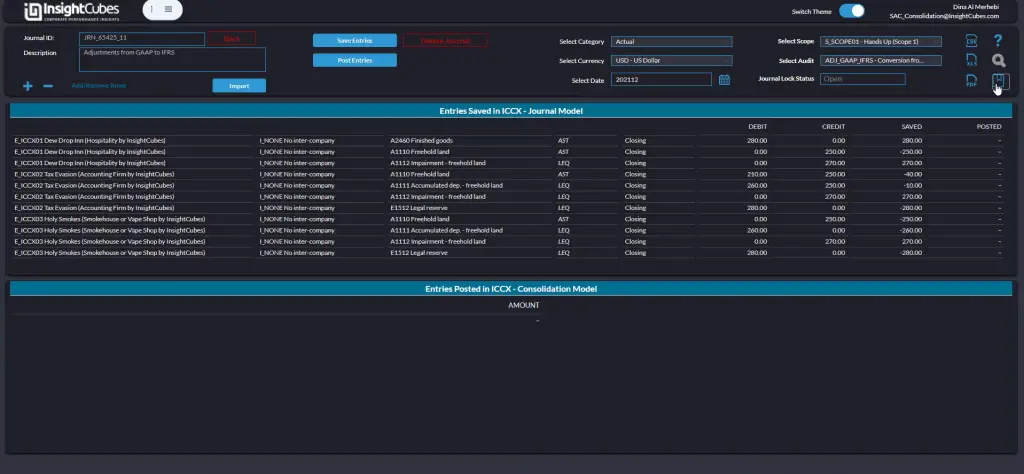
After you add the entries to the journal, you can click the ‘Save’ button to temporarily store them without finalizing. This lets you review and adjust the entries before posting and ensures your work is preserved for later editing or review
To check the values you have saved, click the Report View button. This will show you the debit, credit and saved values in the journal table.
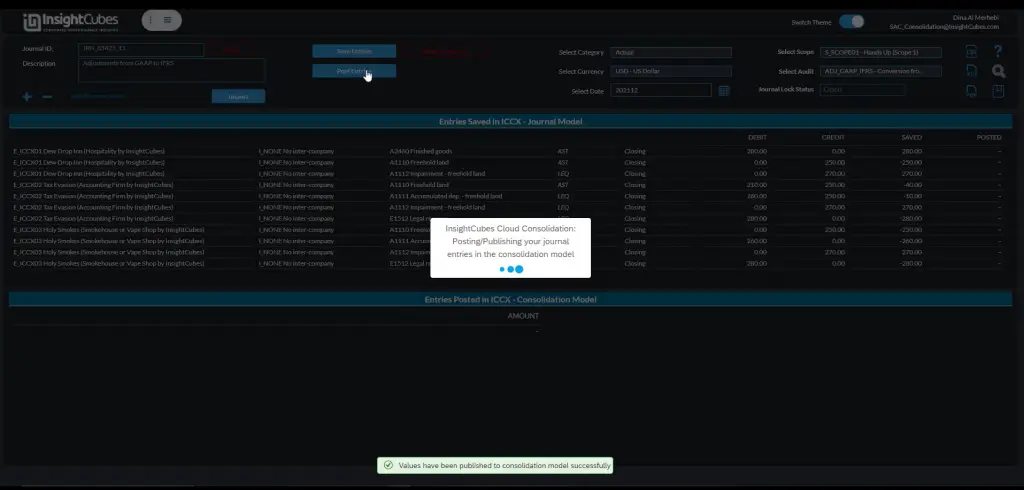
Posting entries
By clicking ‘Post Entries,’ the system publishes the values to the consolidation model. This action updates the financial records by adjusting any existing amounts according to the new debit and credit values, based on the account types.
Locking Journal
Click “Lock” to secure your journal entry after it has been saved and posted, to prevent any further modifications. Only users with the Journal Manager role have the authority to lock a journal. This step is crucial for maintaining data integrity and preventing unauthorized changes.
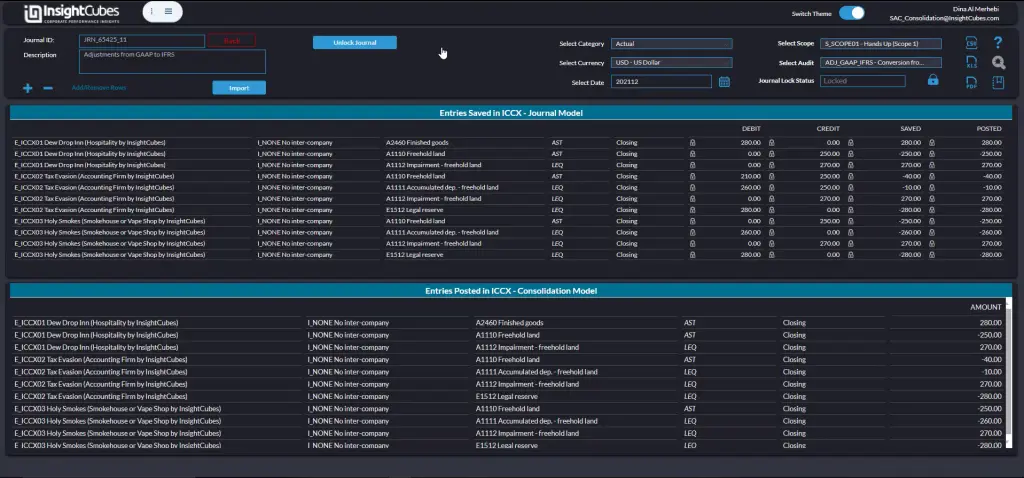
Un-locking and un-posting Journal
The same users with Journal Manager role can unlock the Journal. You need to perform this activity if you want to unpost, edit, or delete the journal.
You can now unpost the entries you posted. The system records the delta effect on the consolidation model for each account in the journal.
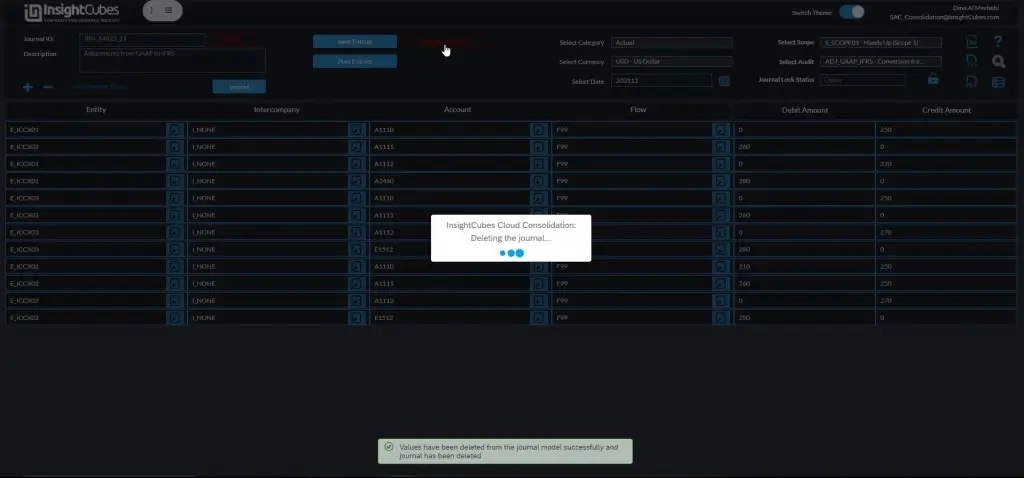
Last, users can delete saved journals in full. This will remove all the entries from the journal table and delete the journal ID and all its properties from the journal table.
Finding a Journal
To open a previously created journal, click on the Find Journal button, a popup with all the available journals will appear, chose the desired journal and click View Select Journal.
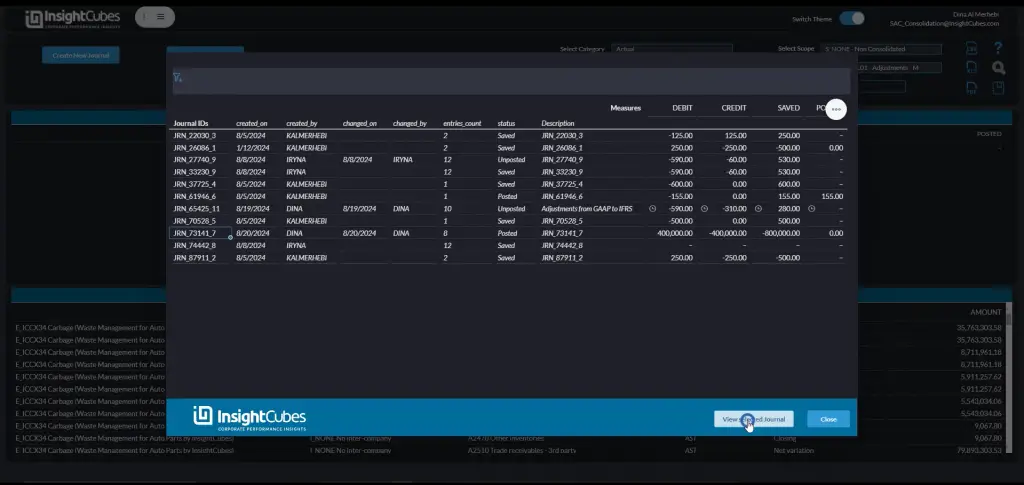
To open a previously created journal, click on the Find Journal button, a popup with all the available journals will appear, choose the desired journal and click View Select Journal.
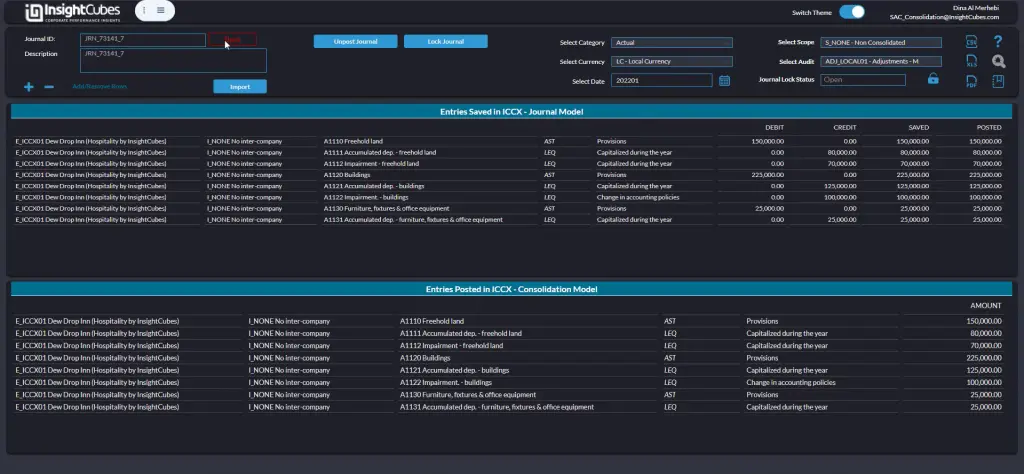
The journal with all the saved and published records on both the InsightCubes Journals Model and InsightCubes Cloud Consolidation Model reports are open.
To edit a journal, first click the “Edit Journal” button.
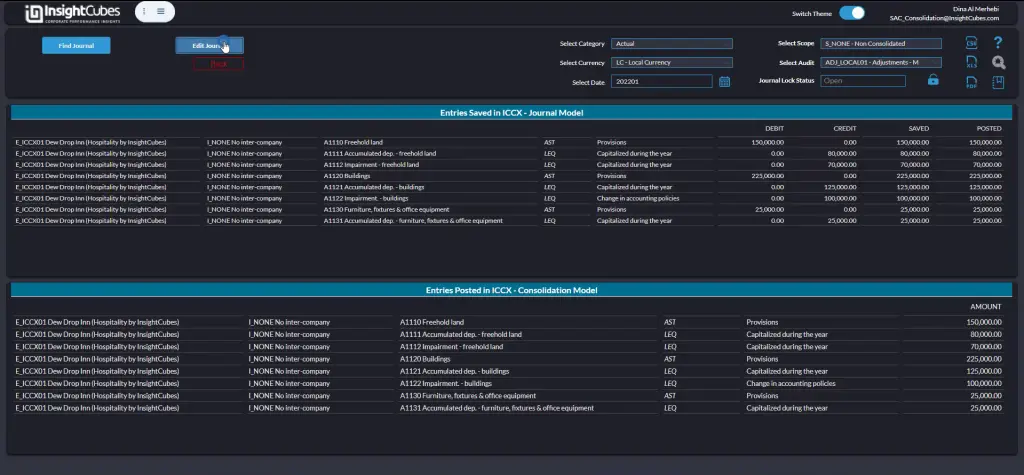
You can change data in the edit mode table view by selecting the data point, updating the information, and clicking the ‘Save Entries’ button.
