In this blog, we will describe how to create new Currencies & Rates which will allow us to convert the financial statements from the Local Currencies of the Entities to the different reporting currencies and group reporting currencies per specific flow.
Creating and Assigning new Currencies
The first activity in creating a new Currency is to simply input a 3-digit I.D. and description. The Analytic Application allows users to adjust multiple dimension members and properties without writing code when adding a new currency or rate.
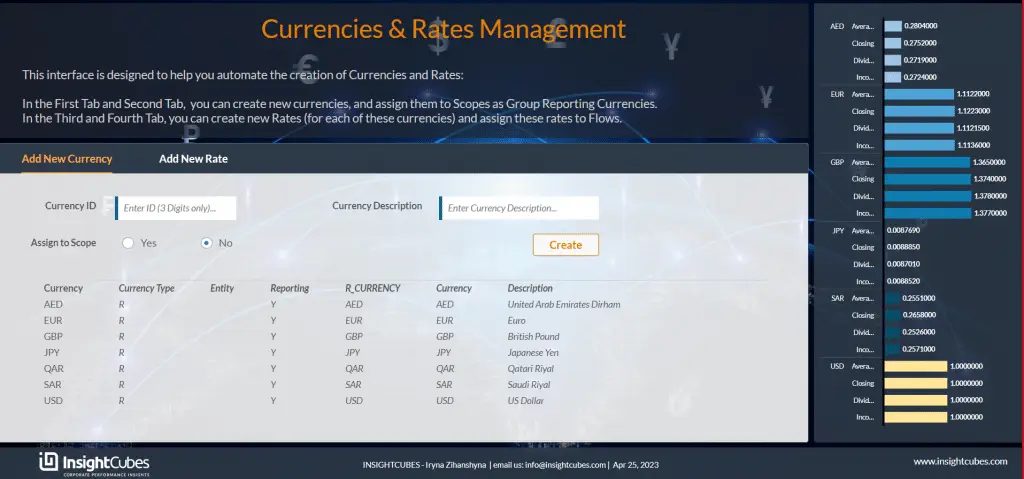
The user simply inputs the Currency ID and description. Then, they select a Scope by choosing the corresponding radio button.
Selecting “Yes” on the radio button makes the “Assign Currency to Scope” tab visible.
By clicking Create, the Analytic Application adds the currency to the required dimensions automatically, with no extra coding needed.
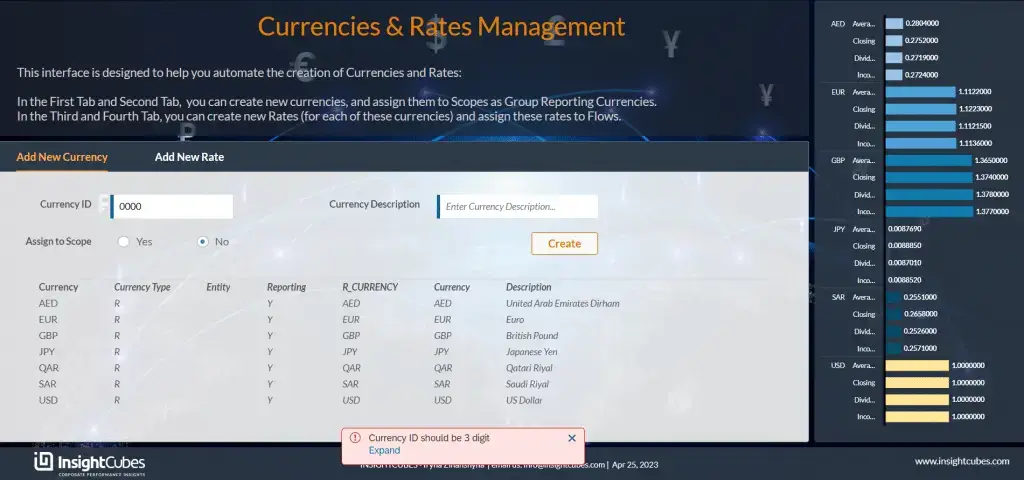
If the user inputs an invalid ID, the system will generate an error message with an explanation of the violation, as shown in the image below.
A list of all Scopes appears automatically in the “Assign Currency to Scope” tab.
Once the user selects a Scope the system will show details such as Scope Id, description, and group currency.
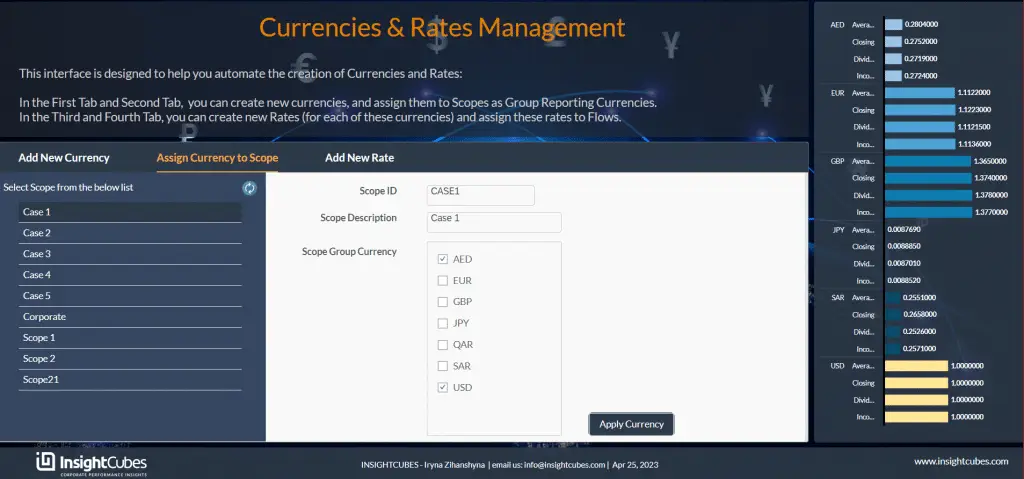
Users can add/remove multiple currencies to a Scope by using the checkbox group “Scope Group Currency”.
Creating and Assigning new Rates
The second activity is creating a new Rate. This also requires entering a 3-digit ID and description. The Analytic Application lets users adjust multiple dimension members and properties.
As a result, no coding is required when executing currency conversion with new rates and currencies.
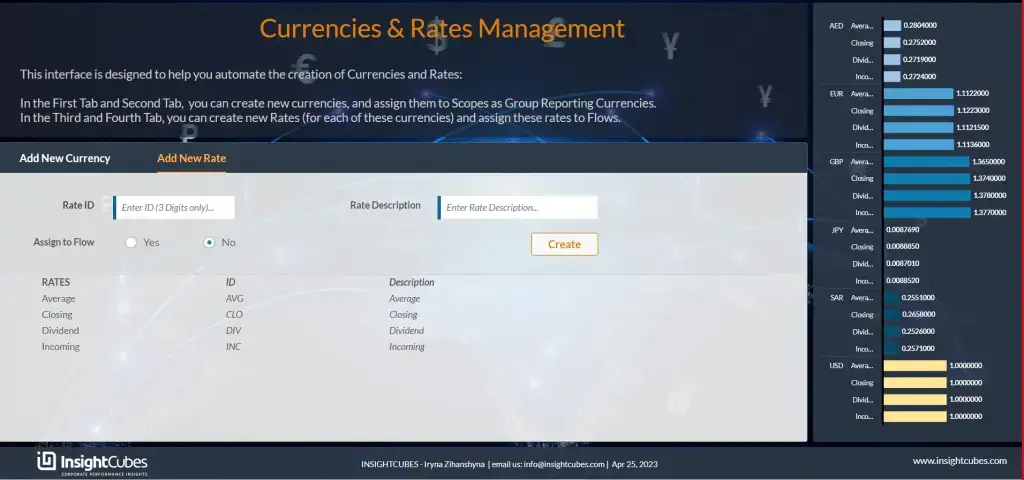
After inputting the ID and description for the Rate, the user chose to assign it to a Flow, by selecting from the radio button. Selecting “Yes” on the radio button makes the “Assign Rate to Flow” tab visible.
By clicking Create, the Analytic Application adds the rate to the required dimensions automatically, with no extra coding needed.
If the user inputs an invalid ID, the system will generate an error message with an explanation of the violation.

The “Assign Rate to Flow” tab automatically generates a list of all Flows.
Once the user selects a Flow, the system will then display details such as the Flow ID, description, and current rate
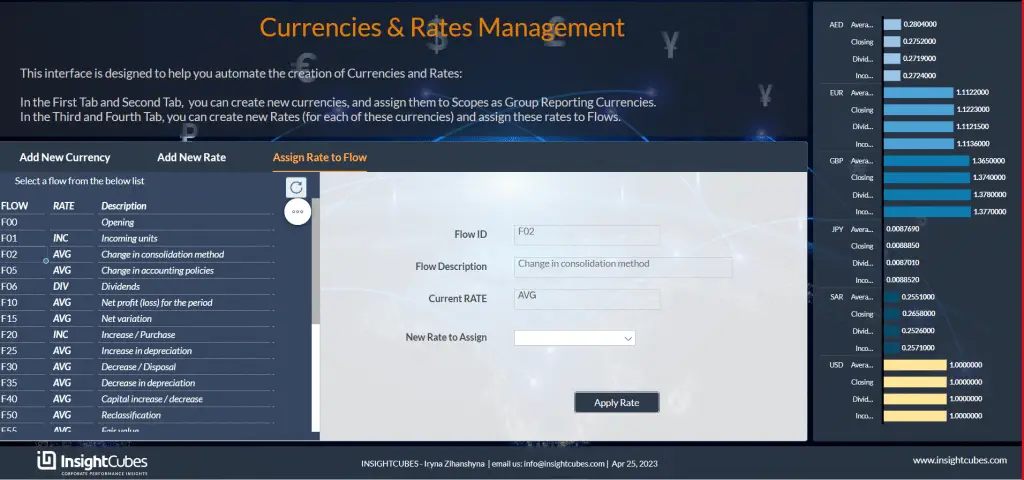
Finally, from the dropdown “New Rate to Assign” the user can select the rate and save it to the dimension by clicking the button “Apply Rate”. The system updates the selected flow’s rate and adds related properties across dimensions, requiring no coding for currency translation.