How to use the addDimensionToColumns(), addDimensionToRows(), getDimensionsOnColumns(), and getDimensionsOnRows with SAP Analytics Designer
Wondering how to use the addDimensionToColumns() API?In this blog, we will be explaining how to use:
- addDimensionToColumns() API adds to dimension to the Columns axis, at the specifies position, If no position is specified, then the dimension is added as the last dimension of the Columns axis.
- addDimensionToRows() adds to dimension to the Rows axis, at the specifies position, If no position is specified, then the dimension is added as the last dimension of the Row axis.
- getDimensionsOnColumns() returns the dimensions on the Column axis
- getDimensionsOnRows() returns the dimensions on the Row axis
Before we get into the technical part of adding and removing dimensions from rows and columns, I will start with an brief overall explanation about the EPM style report so you understand some of the functionalities and connect the dots quicker.
Overview of the EPM Report Developer Application
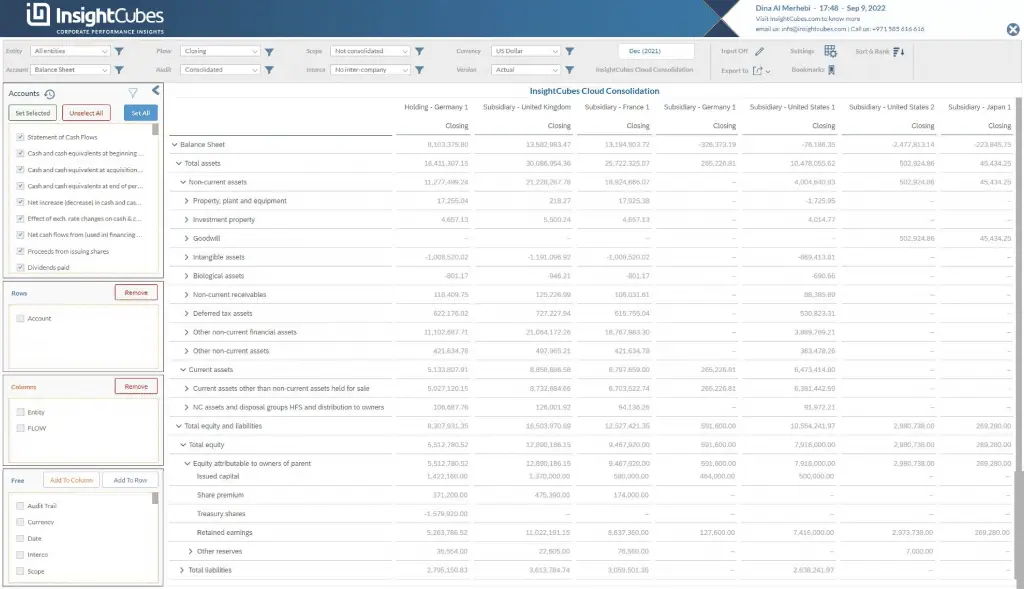
The EPM Report Developer Application is a self-service reporting application designed to enable end users to customize their financial reports and bookmark them privately and publicly. By doing so, organizational users can access the bookmarks and view the report in the required structure and details without any further action.
The InsightCubes Cloud Consolidation – EPM Report Developer Dashboard includes a global filtering pane at the top for Entity, Account, Flow, Audit Trail, Scope, Intercompany, Currency, and Version; allowing the user to detail their selection through a popup filter option for each dimension based on dimension Hierarchy, Properties, the dimension location on the report with the option of removing it from the report and a member selection pane.
The filter pane also includes a Date selector filter, the ability to export the report to Excel, PDF, and CSV; Input on and off optionality, bookmarking selections, report settings, and sort and rank.
Checkbox Groups on the Dashboard
On the left side of the EPM Report Developer dashboard you find four checkbox groups.
- Accounts Checkbox – Lists all accounts. Users can select accounts individually or by attributes using the filter button.
- Rows Checkbox – Includes dimensions currently in the rows of the report with the option to remove them.
- Columns Checkbox – Includes dimensions currently in the columns of the report with the option to remove them.
- Free Checkbox – Contains all remaining dimensions in the planning model. Users can add dimensions to rows or columns with a single click
Configuring the Report with Dimensions
The SAP Analytics application below lets users configure their report by selecting specific dimensions for columns and rows, and refine it by specifying members based on IDs or property values. However in this blog we will only be discussing how to add and remove dimensions from rows and columns, and how to get the dimensions that exist in the rows and columns of the report.
Using the Free Checkbox
The Free Checkbox includes all dimensions in the planning model. Each dimension can be added to either rows or columns in the report with a single click. Removing a dimension from the Columns or Rows checkbox groups automatically returns it to the Free Checkbox for reuse.
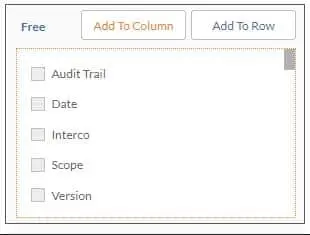
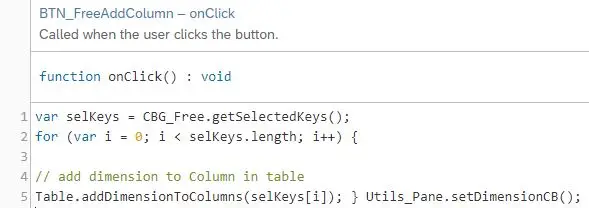
Add To Column button utilizes the addDimensionToColumns() as shown in the snippet below
Add To Row button utilizes the addDimensionToRows() as shown in the snippet below

Managing Dimensions with Script Variables
On the dashboard, we list the dimensions and create two global script variables, CurrentDimensionColumn and CurrentDimensionRow, as arrays of type string. We get the dimensions from the table and add them to CBG_AllDimensions (hidden Checkbox Group), which triggers the setDimensionCB script object.
We create a local variable dimCol to store all column dimensions in the Table widget. Next, we compile this result and push to the global Script Variable “CurrentDimensionColumn” as shown below

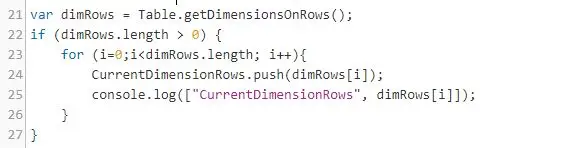
We create a local variable dimRows to hold all row dimensions in the Table widget. Finally, we compile this result and push to the global Script Variable “CurrentDimensionRows” as shown below
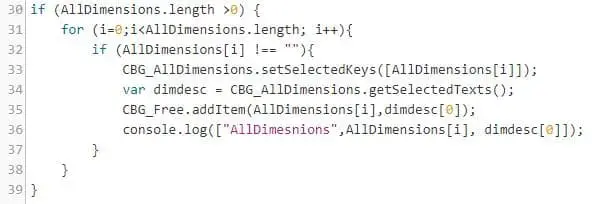
Adding all the dimensions to the Checkbox group called CBG_free as shown below
Compile the dimensions in CurrentDimensionRows, add them to CBG_Rows, and remove them from CBG_Free, as shown below

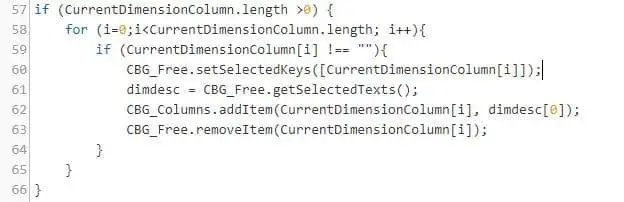
Compile the list of dimensions found in the global script variable called “CurrentDimensionColumn” and add them to the Checkbox Group called CBG_Columns and remove them from the Checkbox Group called CBG_Free as shown below

You now know how to utilize the addDimensiontoColumns() API with our software.